Classroom Screen Noise Monitor
A free classroom noise monitor that turns volume into a visual bar students respond to — sound level meter, voice level display, no repeating yourself.
Enable mic to measure classroom volume
Mic audio is processed locally in your browser and never uploaded. Privacy policy
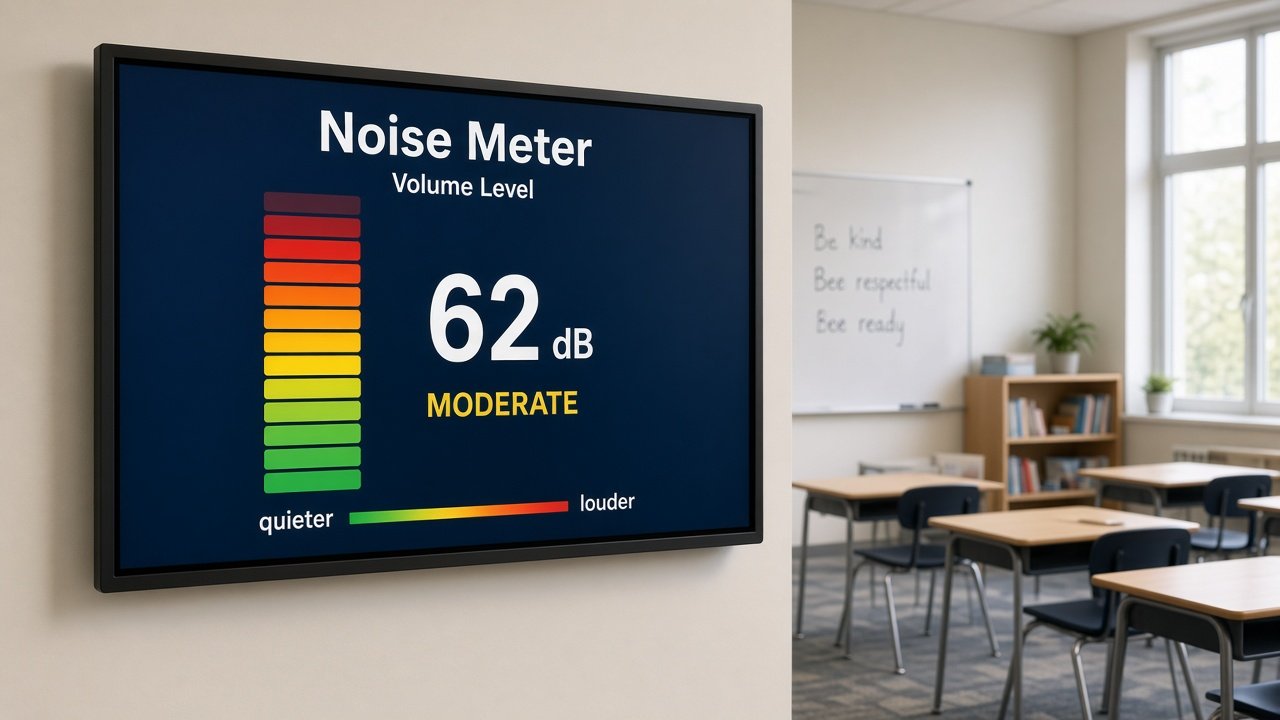
Yes — MyClassScreen is a free sound level meter for classroom use. It works in any browser, uses your device microphone to show live noise levels as a big projectable bar, and doubles as a classroom voice level meter and classroom noise monitor. No signup, no app install, and audio is processed locally — nothing is recorded or uploaded.
Classroom screen noise monitor vs. standalone apps
Standalone sound monitor apps do one thing. MyClassScreen lets you run a classroom screen noise monitor alongside a timer, traffic light, and agenda on the same projected board — so volume cues stay visible during transitions instead of switching tabs mid-lesson.
For deeper routines, see our quiet monitor ideas guide with five strategies and a copy-paste quiet monitor recipe.
Why a visual noise meter beats repeating yourself
Every teacher knows the cycle. The class gets loud. You say "inside voices." They comply for about thirty seconds. Then the volume creeps back. You say it again, a little sharper this time. By the fifth reminder, you are annoyed and half the room has stopped listening.
A classroom noise meter breaks that pattern by giving students something to look at instead of something to tune out. When the bar climbs into yellow or red, they adjust on their own. The meter does not have a bad day. It does not favor the table near the window. It just shows what the room actually sounds like right now.
I started using a projected sound meter after watching a colleague tape a paper chart to the wall. Kids ignored the paper within a week because it never changed. A live bar that moves with their voices? That gets attention. Even sixth graders glance at it before raising their volume again.
Your microphone stays private
Reasonable question from parents and admins: is this thing recording my students? No. The noise meter reads volume levels in your browser and displays them on screen. Audio is not sent to a server, stored in a database, or saved anywhere. Processing happens on your device in real time, then the data is discarded.
That matters in schools where privacy policies are strict and parents ask hard questions. You can point them to our Privacy Policy for the full details. For day-to-day use, the short version is: the mic measures loudness, nothing more.
Calibrating for your room
No two classrooms sound the same. A portable in a hallway with thin walls behaves differently from a carpeted room with acoustic panels. The sensitivity slider lets you match the meter to your space instead of fighting it.
My routine: I tell students what volume I want for the activity — table talk, partner whisper, silent reading. Then I adjust the slider until their normal volume sits in green. If the bar jumps to red when one kid drops a pencil, sensitivity is too high. If twenty conversations barely move the needle, turn it up.
You will recalibrate when you move rooms, when the HVAC kicks on, or when you switch from individual work to group work. That takes ten seconds once you know the slider. Much faster than resetting the whole class after a shouting match.
Pair it with a traffic light for clear rules
The noise meter shows what is happening. The traffic light tool tells students what should be happening. Green means normal conversation is fine. Yellow means whisper only. Red means silence. Put both on the same board and students learn the system within a day.
During writer's workshop I run green plus a relaxed meter threshold. During a quiz I flip to red and tighten sensitivity so even a murmur shows up. The combination cuts down on "but I was just asking one question" because the rules were visible before anyone spoke.
What changes when students can see the bar
Peer pressure works in your favor here. When one table goes loud and the bar spikes, other groups notice before you do. I have heard kids at neighboring tables say "shh, we are going red" without me saying a word. That is the whole point — shifting responsibility from your voice to a shared reference point.
Younger grades respond well to gamification. Set a challenge: keep green for three minutes and earn two extra minutes of free choice. Older students often prefer a straightforward explanation — the meter is neutral data, not a punishment tool. Tone matters when you introduce it.
If you have used bouncing balls or similar visual noise tools before, this works on the same principle without extra software to install. It runs in the browser on whatever machine is connected to your projector. See our Bouncy Balls alternative guide for a side-by-side comparison if you are switching over.
Common setup mistakes (and quick fixes)
The microphone on your laptop picks up keyboard clicks and chair squeaks more than voices across the room. If possible, position the computer near the center of the class or use an external mic on your desk. You do not need expensive gear — a basic USB mic often reads the room more accurately than a laptop sitting in the corner.
Another snag: the browser blocked mic access and nobody noticed. If the bar never moves, check the address bar for a crossed-out microphone icon. Reset permissions, refresh the page, and click Allow. Do this before students arrive so you are not troubleshooting during a lesson.
Some teachers worry the meter will distract from instruction. In my experience the opposite happens once the novelty wears off — it fades into the background like a clock on the wall until volume rises. Keep it in a corner of the board rather than dead center if you want less visual competition with your slides.
Specials teachers and librarians use the same tool in shared spaces where multiple classes pass through. Calibrate once per session, explain the zones in thirty seconds, and move on. The meter travels with your account — no reinstalling apps on each cart laptop.
Ways teachers use the sound meter
Group Work Sessions
Project the meter during collaborative activities. Set a reasonable threshold and challenge groups to keep the bar in the green.
Testing Environments
During assessments, keep the meter visible. Students watch the bar instead of waiting for you to shush the room.
Indoor Recess
When weather keeps everyone inside, turn volume control into a game. Can they stay below yellow for five straight minutes?
Transition Management
Noise spikes during pack-up time. Run a two-minute timer next to the meter and watch the room settle faster.
How to set up the noise meter
- 1 Open MyClassScreen and add the Noise Meter widget to your classroom board.
- 2 Click Allow when your browser asks for microphone access.
- 3 Have students talk at the target volume, then adjust the sensitivity slider until the bar reads green.
- 4 Project the board full-screen on your smart board or projector.
- 5 Tell the class what each color zone means for today's activity.
- 6 Switch to yellow or red thresholds when you move from discussion to independent work.
Try the noise meter in your classroom today
Open the editor, add the sound level widget, and grant microphone access. Takes under thirty seconds.
Launch Free Noise Meter